Laptop Screen Replacement Project
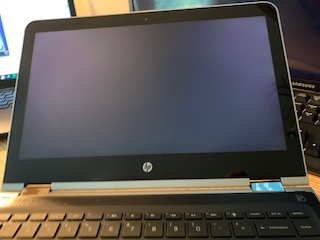
I recently had an opportunity to do a little repair work on a laptop owned by a relative of mine. The laptop in question is an HP Pavillion x360 Convertable PC, Model# m3-u001dx. My relative stated that the screen on the laptop would turn on, but nothing would be displayed.


Step 4


Troubleshooting
To start troubleshooting the problem, I made sure that the laptop had power and was connected to the power adapter. Afterwards, I rebooted the computer by doing a forced shutdown using the power button. After turning the computer back on, the screen lit up but nothing was displayed. I again rebooted but this time attempted to boot into safe mode. I did this by pressing the Windows + B buttons while pressing the power button and releasing them all at the same time. Still nothing. Finally, I connected the laptop to my TV using and HDMI cable.
Using the HDMI cable, I was able to see the screen and access the desktop. From there, I conducted a virus scan and updated windows as well as the graphics and display drivers. I also made sure that there was not a screen cast issue. After checking all of these things, the LCD display on the laptop was still not working.
At this point, I know I'm going to have to replace the LCD display. After some Googling, I was able to find a replacement part for about $150. Still cheaper than a new Laptop. I was given the go ahead to replace the screen and ordered the part.
I then made a full backup of the computer and saved it to an external hard-drive. I needed to also make a copy of a few files that my relative needed, and placed them on a flash drive. I then began the tear down process.
iFixit.com has an excellent step by step guide for this process so I just followed along.
Step 1
In order to replace the screen we basically have to take the laptop completely apart. To do this we start by removing one of the rubber bands on the bottom of the laptop. This uncovers approximately 5 screws that will need to be removed. There are additional screws located at the bottom of the laptop and one in the center.

Step 2
Once the screws are removed, we can then flip the laptop back over and open it up. We need to remove the keyboard next. To do this the keyboard will need to be pried up using a spudger. Be careful not to break any of the tabs. The keyboard came up pretty easily for me. Once the keyboard has been pried up, you will need to disconnect the touch-pad and keyboard input cables from underneath. This is done by flipping up the plastic cable locks on the motherboard.

Step 3
After disconnecting and removing the keyboard, the battery needs to be removed. This is done by removing the screws that hold it in. There are approximately 6 screws. Once the screws are out, lift the battery from the bottom right and slide it backwards towards you.

On the upper right side of the laptop is an adhesive strip that connects a metal shield to two USB ports. You will need to remove this strip. Unfortunately, I forgot to get a picture of this, but you can see the adhesive strip clearly in the second picture in step 5.
Step 5
At this point we will start disconnecting the cables that are attached to the motherboard. The Cables and connections are as follows:

Two antenna cables next to the fan.

This is located next to the UBS Shield I spoke about in Step 4.

This is located just below the two antenna cables.

This is the cable that connects the hard-drive to the motherboard.

This is located in the center top portion of the motherboard.

These are located on the left side of the motherboard.
Step 6
We can now unscrew the motherboard from the laptop. There are 10 total screws. Most of the screws are easy to find, but the last screw is a small silver screw located next to the antenna cables.
Step 7
Carefully lift the motherboard up. There is one final cable that needs to be disconnected. This is located underneath the motherboard on the left side.

Step 8
With the motherboard out of the way, the hinges that connect the screen to the keyboard can be removed, and the monitor removed from the base.


Step 9
Now the screen can be gently pulled away from the bottom. This was a little tricky for me, but I think the key is to take you time and gently wiggle the hinges out of the bottom. Make sure that the cables are out of the way.
Step 10
Starting at the top of the screen use a spudger to slowly pry the screen away from the silver plastic back of the screen. I was too focused on making sure that I didn't damage the screen to get a photo of this.
At this point the screen will be separate from the bezel. The replacement part I ordered came with new cables already attached to the screen. I did not need to disconnect anything else. Once the old screen was removed, I simply reversed these steps. The new screen went in very easily.
Once everything was connected, I checked to make sure that everything worked properly by powering on the laptop, signing into the user account. I then turned on the camera and the microphone. Both worked perfectly. I then connected to WiFi and opened an internet browser. Finally, I opened the C: drive and made sure that all of the documents/user data was still there. Everything worked perfectly and I delivered the repaired laptop to my relative.
Comments
Post a Comment